
Notifications
Notifications can be created in Kitchen iQ to perform two functions:
-
Send Pager notifications when items are ready
-
Create an on screen notification for the preparation and check of a table
To use paging notifications a separate companion application Message Hub must be setup and the appropriate paging hardware configured on site
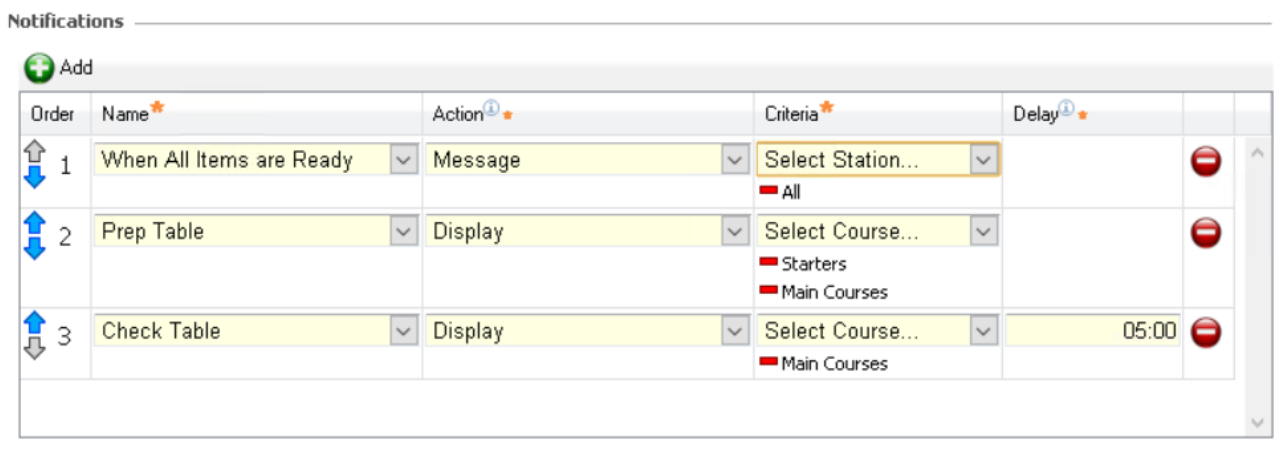
| Option | Description / Usage |
| Order |
Arrows to re-order the notification rules - when the system looks for any notifications it works down the list from order 1 |
| Name |
Drop down to define the notification type
|
| Action |
Drop down to define the action
|
| Criteria | Drop down to define the station criteria where the notification will be triggered from |
| Delay | Entry box to define a timed delay before the notification is generated (Check Table only) |
Adding New Notifications
-
Select the Notifications tab
-
Click Add
-
Select the required notification type from the Name drop down
-
Select the applicable Action from the drop down
For "items ready" notification types only an action of message is available
-
Select the required station from the Criteria drop down
-
If the notification type is Check Table specify in the Delay entry box a time in MM:SS
-
Adjust the Order as required using the up / down arrows
-
Click Save
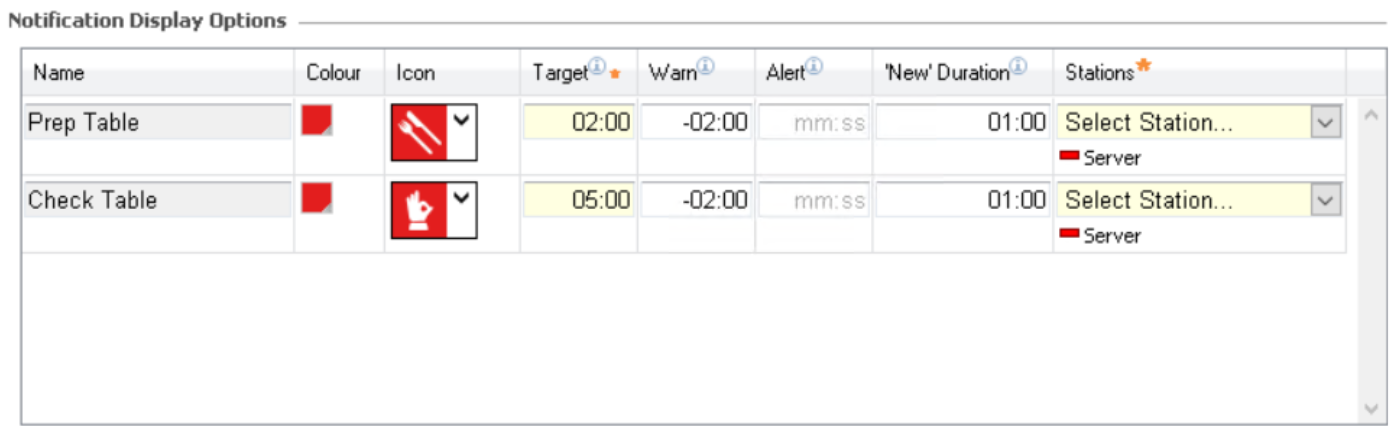
| Option | Description / Usage |
| Colour |
Colour selector to define the colour of the notification indicator on the display ticket |
| Icon |
Icon selector to define the optional icon indicator on the display ticket |
| Target |
Entry box to define the notification completion time MM:SS |
| Warn | Entry box to define the notification warn time in MM:SS (displayed in amber) when the notification is approaching the target time |
| Alert | Entry box define the notification alert time in MM:SS (displayed in red) when the notification is near or at the target time |
| New Duration | Entry box to configure the MM:SS of a new notification ticket displayed |
| Station | Drop down to define the station that the "display" notification will appear on |
Notification Display options are only displayed if a Prep or Check Table notification type is setup (otherwise this section remains blank)
Updating Display Options
-
Select the course Colour from the picker
-
Select an optional Icon from the drop down
-
Update the Target | Warn | Alert times as required for the configuration of the notification in MM:SS
-
Update the New Duration time as required for the configuration in MM:SS
-
Select the required Stations from the drop down
-
Click Save